I have a problem. My problem is that there are about 50 million different projects that I want to do and I just don't have enough time to get them all done! Let me outline just a few. We'll start with my lighting dreams...
 This is the light that I want to go above the island in the kitchen. The small problem is that Pottery Barn thinks that I should spend $399 on it and I very strongly disagree. Solution, I'm going to make one. I found very detailed instructions here that I am going to alter slightly to fit my needs. I think I can make my version for around $150 which is way more reasonable. I don't mind spending money on a nice lighting fixture, but I am not putting a $400 light in the DW. That is just a little too fancy for us. Realistically, it doesn't look all that difficult to do. I've found most of what I need online, but I want to use cloth cord for the lights and that is proving a bit more difficult to procure. I'm persistent though, I'll find it! I'll find it if I have to make it myself. Add another month on to this one.
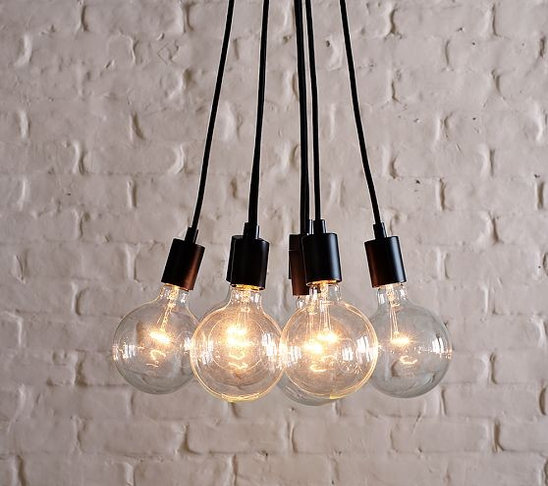
 Lighting project number two. This one is for over the dining room table. Again, I plan to alter it slightly, I want the cords to be gray cloth cords that match the mason jar light and I want the light sockets to be white. I'm also planning on hanging the bulbs at slightly different heights. In my head, it's really cool. We'll see how it actually turns out.
So far that about sums up my lighting project for the time being. I'm sure I will find more things in the world of lighting. Someday I'm going to make things easy on myself and just buy stuff, but I guess there's not much fun in that huh?
Another item on the to do list is the chicken coop. We've got a lot of the supplies to build it, it's just a matter of finding the time to get it done. The plan is to move next weekend and I've told Brad that needs to be the next thing we do. The chicks will be about 4 weeks old by then and should be ready to get out of the house by 6 weeks. I really don't want them in the house when they get that big.
 Dog Run- This one sounds simple enough in my head, but I know these things never are. We've decided that the front door will lead out into the dog run since we won't ever be using it anyway. Like the coop, the picture for this is in my head, but Brad really wants us to throw down gravel. I agree, though I'm a little concerned about drainage. The last thing I was is for it to reek of dog pee.
Coffee Table! I want to build a coffee table out of some old pallets that I have. I can never seem to find a coffee table that I like, so I'm making one. This is kind of what I'm thinking, though I'm toying around with some other options too. I definitely want it on casters, cause that's just kind of cool. I'm kind of thinking I want more of a bleached out wood look, though I'm not sure how to do that without doing a whitewash style. Whitewash could look pretty cool though. Decisions decisions.
 A tufted ottoman for our "closet". Our bed and dressers won't fit in a single room, so we are having a master suite with one whole room dedicated to our clothes! I'm buying, yes buying, garment racks to put up and we'll put our dressers in there as well. I've always wanted a giant walk in closet with an ottoman in the middle. It makes me feel fancy, like a princess. And that makes me happy.
There are plenty more to add to the list, but I feel like I should go tackle some of these things instead of just talking about it. Mostly, I need to get my butt over to the new house and finish putting the cabinet doors up, install the dishwasher & stove. Build a platform for the dryer and washing machine.... the list just never ends! One step at a time, and breath, just breath.
XoXo
Erin


